


The correct installation of anchors is essential to ensure the strength and safety of fixings, guaranteeing optimal performance and long-term reliability. For a secure and durable anchorage, it is crucial to carefully follow installation procedures, use appropriate tools, and comply with the specified installation times and values indicated in the technical data sheets. For this reason, we recommend always consulting the updated product technical data sheets to access any revisions or updates to technical information.
Chemical Anchors
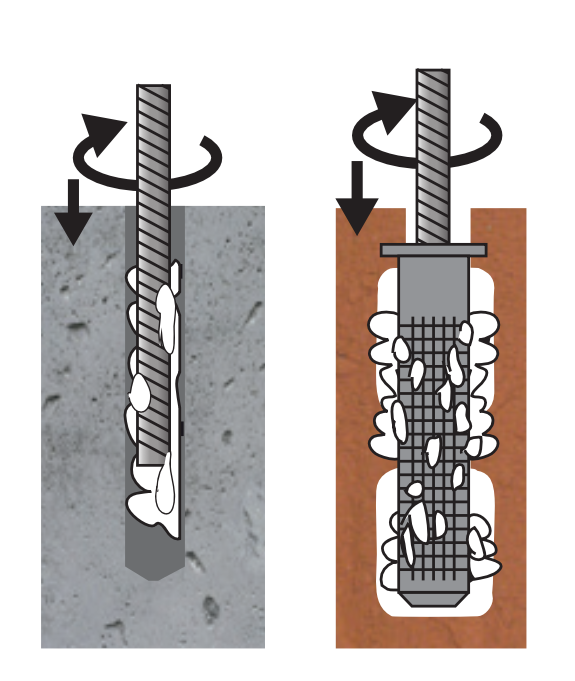
Installing chemical anchors requires precision, dedicated tools, and strict adherence to a sequence of steps to guarantee proper installation, maximum load capacity, and safety.

1. Drill into solid materials using a hammer drill. For hollow materials, use rotation-only drilling to avoid damaging the substrate. Always check the perpendicularity of the hole.
The hole diameter must be larger than the threaded rod or rebar to be installed, as specified in the technical data sheet.

Proceed with cleaning the hole, which is necessary to ensure proper adhesion of the resin. Blow out the hole using a blow-out pump or compressed air to completely remove dust and debris, then clean the walls with a metal brush of a diameter larger than that of the hole (for example, for an M12 rod with a 14 mm hole, the recommended brush diameter is 16 mm). Blow out the hole again until it is perfectly clean.
Incomplete cleaning can compromise load performance and pose a safety risk.

3. Prepare the cartridge by unscrewing the cap. For the 300 ml and 165 ml sizes, remove the metal clip by inserting the mixer into the slot of the plastic extractor and pulling to remove the bag’s closure clip. Then screw on the mixer and place the cartridge into the dispenser, using hand and face protection.

4. Check that the components are properly mixed by extruding an initial portion of the product. The two components (A white and B black) must be fully blended until a uniform color is achieved; only then is the product ready for use.
If mixing is incomplete, the chemical reaction may fail, and the resin may not cure properly, compromising anchoring performance.

5. Extrude the resin starting from the bottom of the hole, filling it to approximately two-thirds of its depth. For perforated materials, insert the plastic or metal sleeve first, then extrude the resin until the cage is completely filled. For deep holes, use extensions attached to the end of the mixer to ensure proper filling from the bottom upward, avoiding air bubbles or areas without resin.
Chemical anchors are thixotropic, meaning they do not flow, making them suitable for overhead applications. Using extension tubes with caps allows precise control of resin flow and ensures complete filling from the bottom up.
6. Insert the clean and dry threaded rod or rebar with a slow twisting motion to eliminate air pockets.

7. Respect the curing times specified in the technical data sheet before applying torque or load.

Mechanical Anchors
Even for mechanical anchors, strictly following the correct operational sequence, from drilling to tightening, is essential to ensure full efficiency and the safety of the anchorage.

1. Drill the substrate using a hammer drill with the correct diameter indicated in the technical data sheet. Always ensure hole perpendicularity.

2. Thoroughly clean the hole using compressed air or a blow-out pump to remove dust and debris, ensuring optimal contact between the anchor and the substrate.

3. Insert the anchor into the hole by tapping it with a hammer, positioning it correctly without damaging either the anchor or the base material.

4. Tighten using a torque wrench according to the values specified in the technical data sheet.
Careful execution of all installation steps is crucial to achieve the load capacities stated in technical data sheets and to minimize the risk of structural failure or inadequate resin bonding. Key factors such as proper hole cleaning, correct resin mixing (for chemical anchors), controlled insertion and torque-controlled tightening are essential to ensure consistent, safe, and long-lasting performance. For every application, always refer to updated technical data sheets and ETA (European Technical Assessment) certifications.
Need support or technical advice? Contact us.


